31st May 2018
Pattern variation
Adding bell sleeves
Statement sleeves are very much on trend and here are two easy ways to add that key look to your wardrobe.
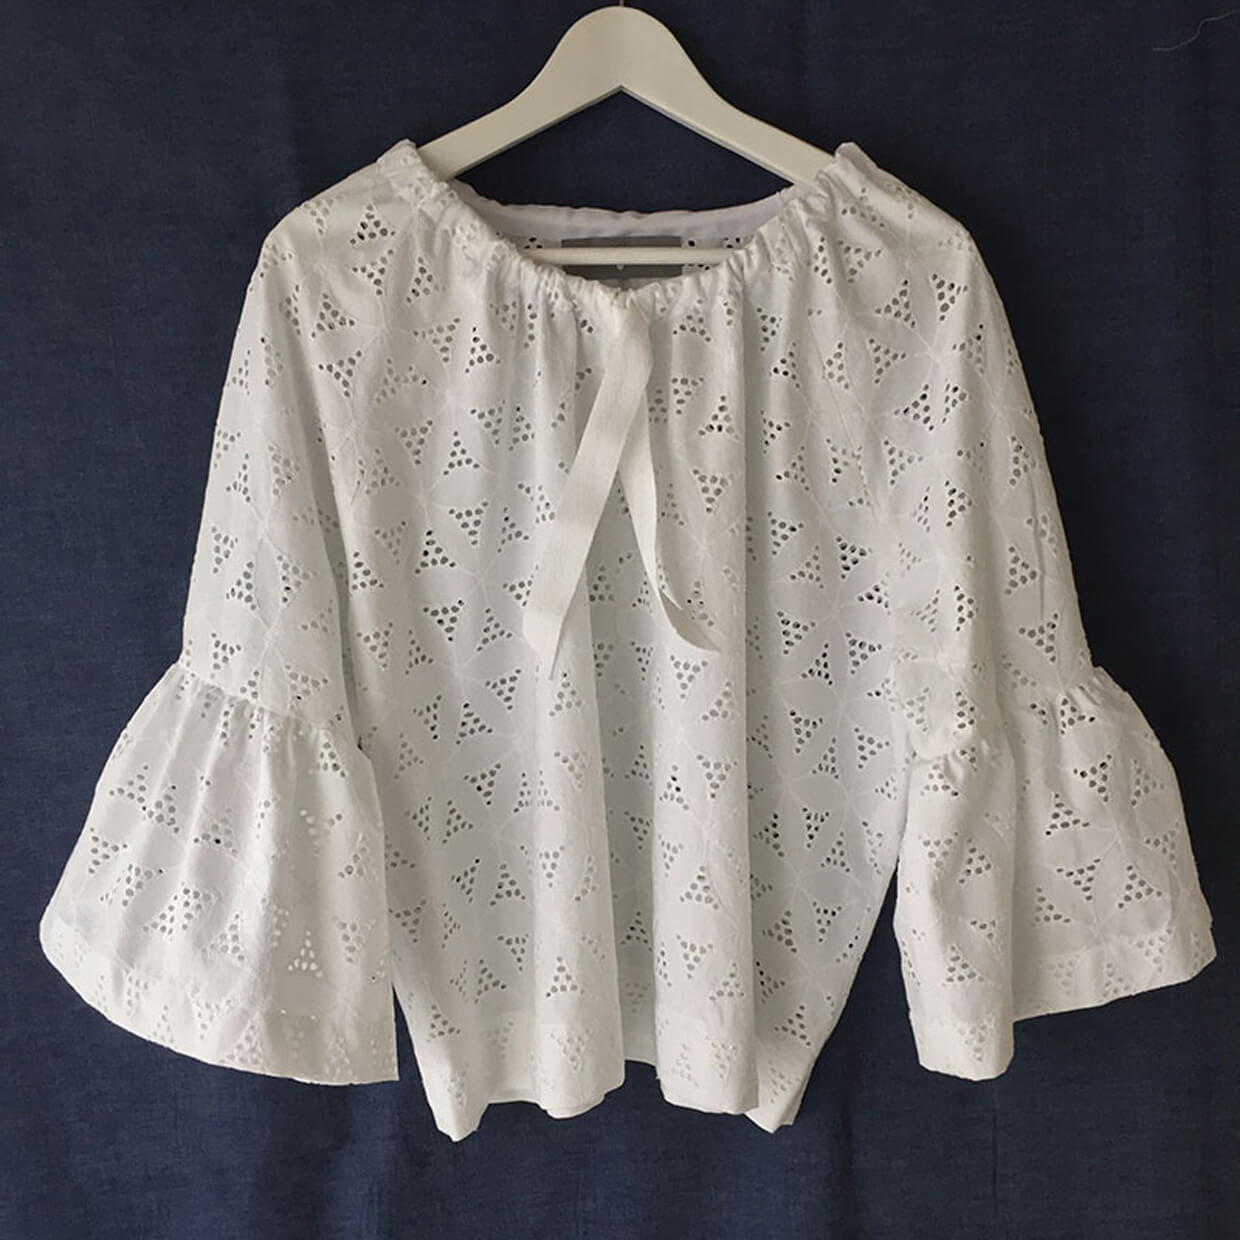
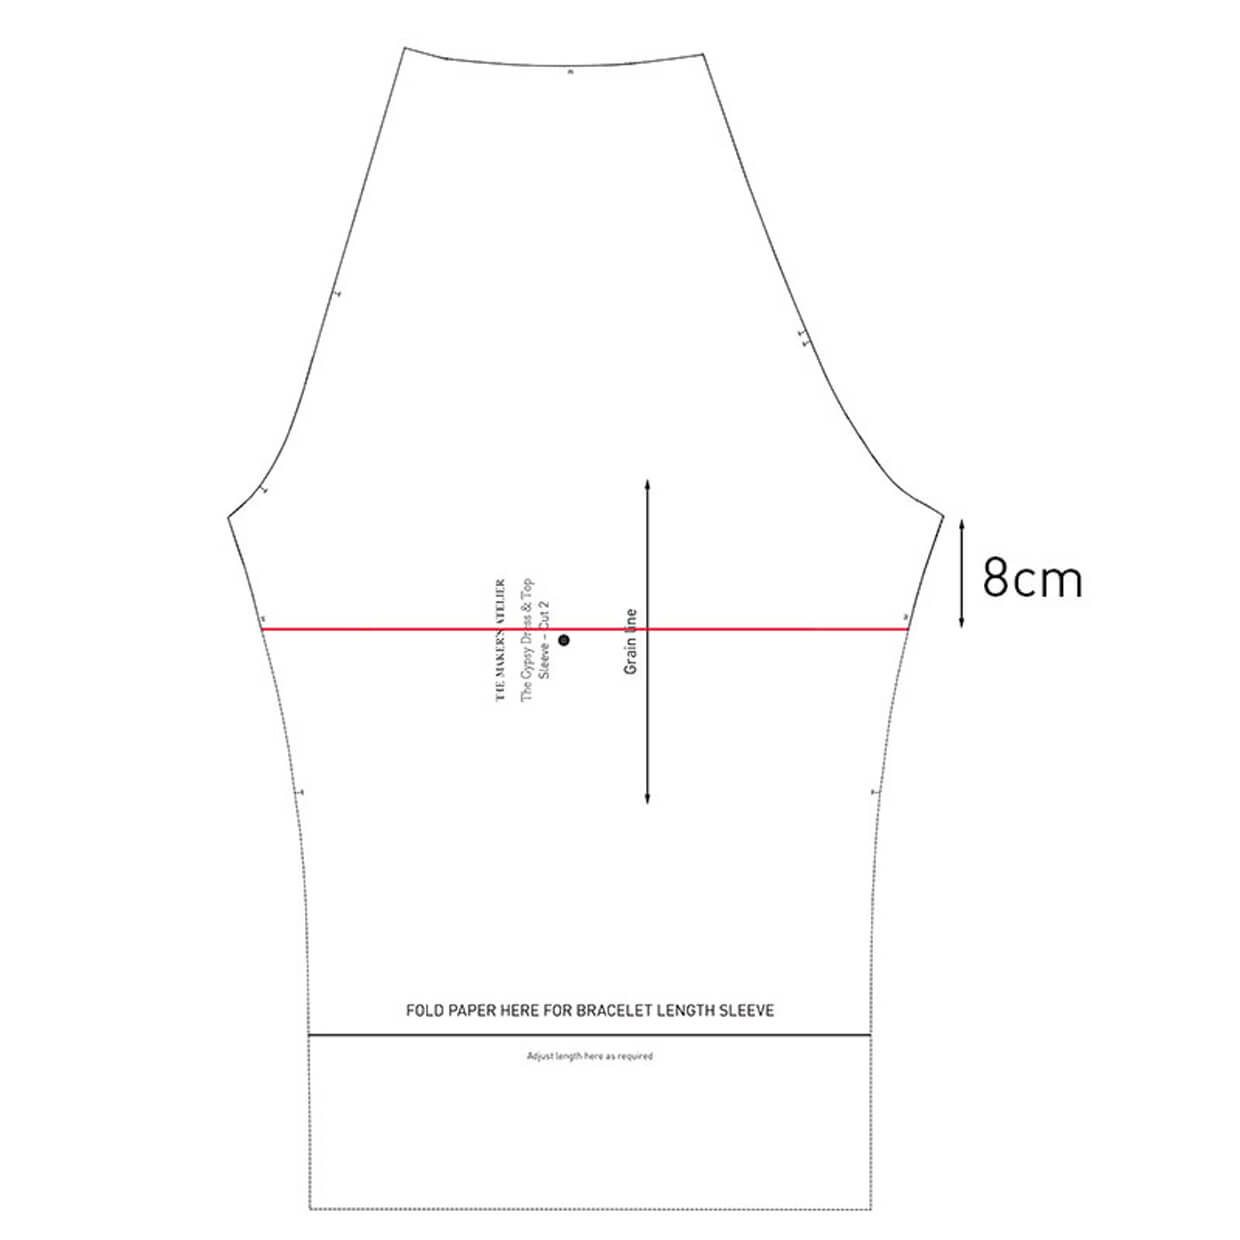
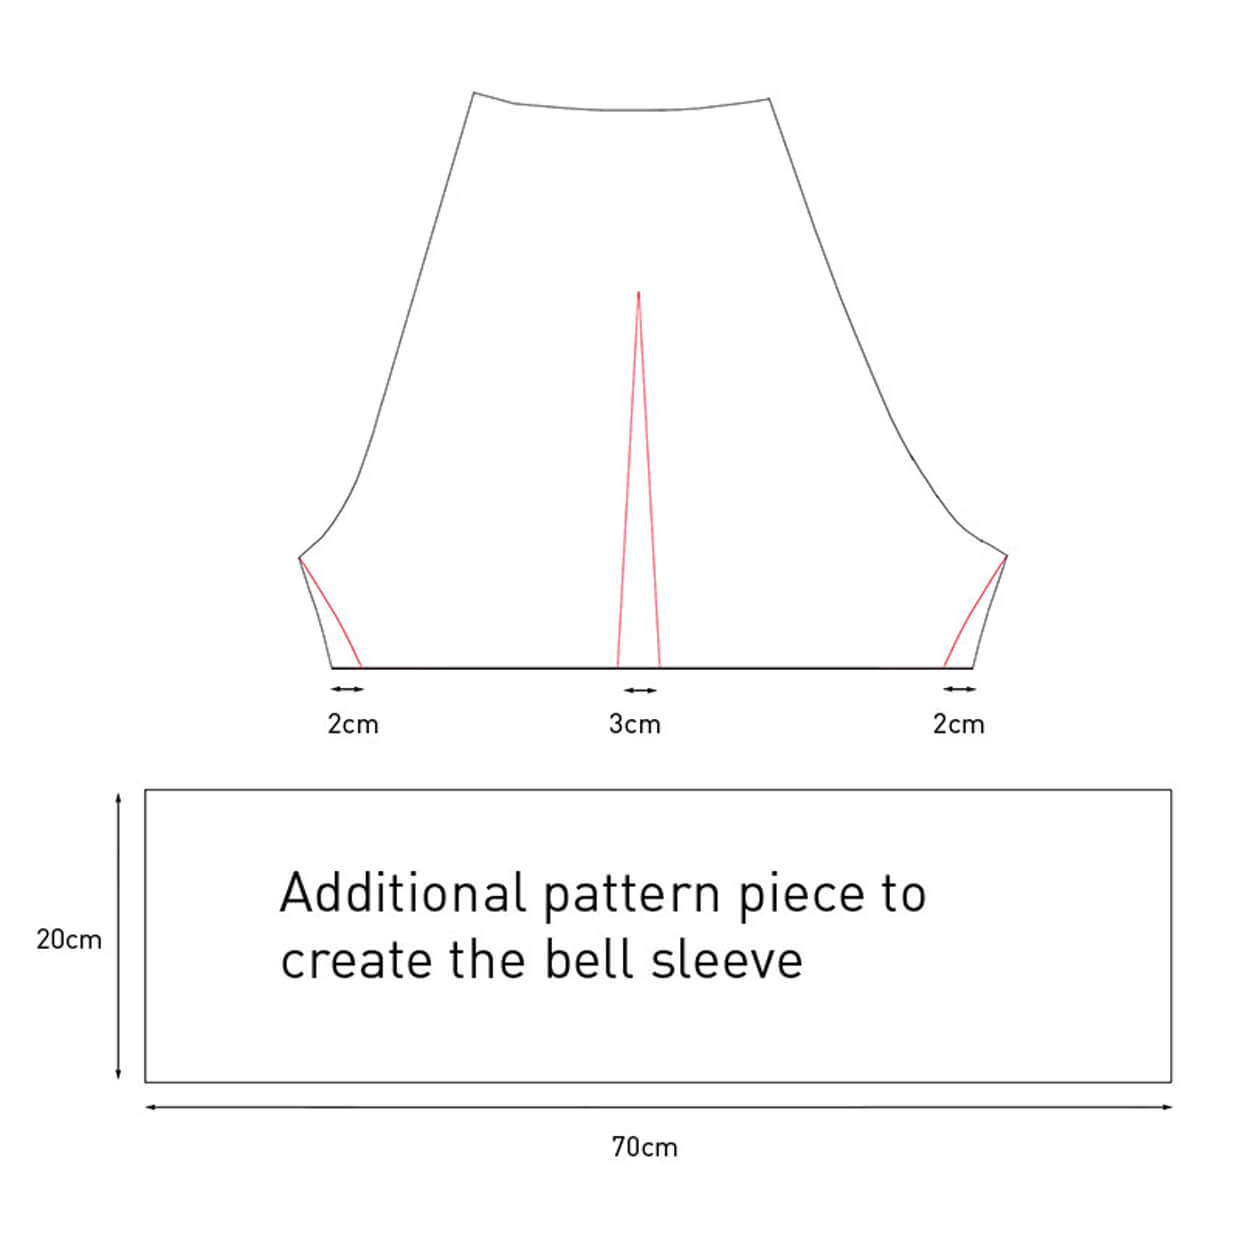
The first is the bell sleeve shape. This has a narrow top part with a gathered full cuff that is most flattering worn bracelet length. Use a fabric with some 'hold' so that the bell shape stands away from your arm. The sample shown here is in cotton Broderie Anglais has a finished sleeve length of 54cm from neck point to cuff. To recreate this style take the sleeve piece from The Gathered Neck Dress and Top and trace off the top section down to 8cm from the underarm point (A) Slim down the sleeve by trimming away 2cm through to nothing on the underarm on either side of the sleeve piece (B). And create a dart in the centre of the sleeve, 3cm at the base tapering away to nothing 18cm from the top edge. Cut two rectangular pieces to form the full bell cuff - these should measure 20cm x 70cm. Start by gathering the top edge of the rectangle - either hand stitch or use the longest stitch setting on your machine, to stitch along and then gather up your fabric to match the width of the top part of your sleeve. Attach the gathered edge to the top sleeve and then recreate your Gathered Neck Blouse as instructed in your pattern.
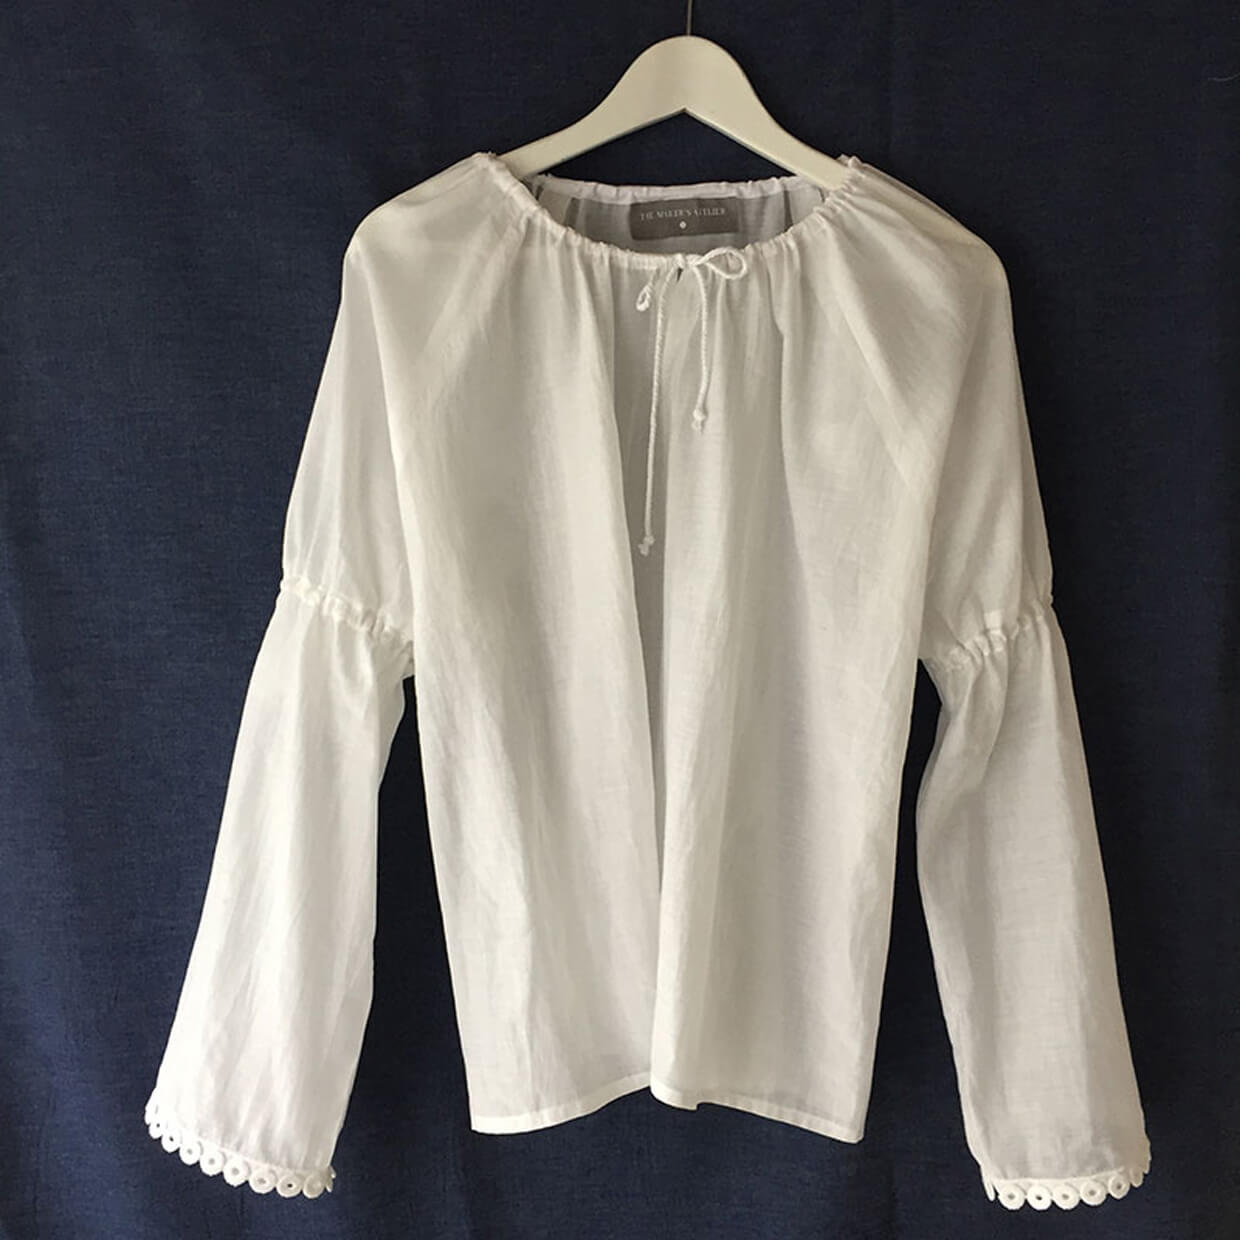
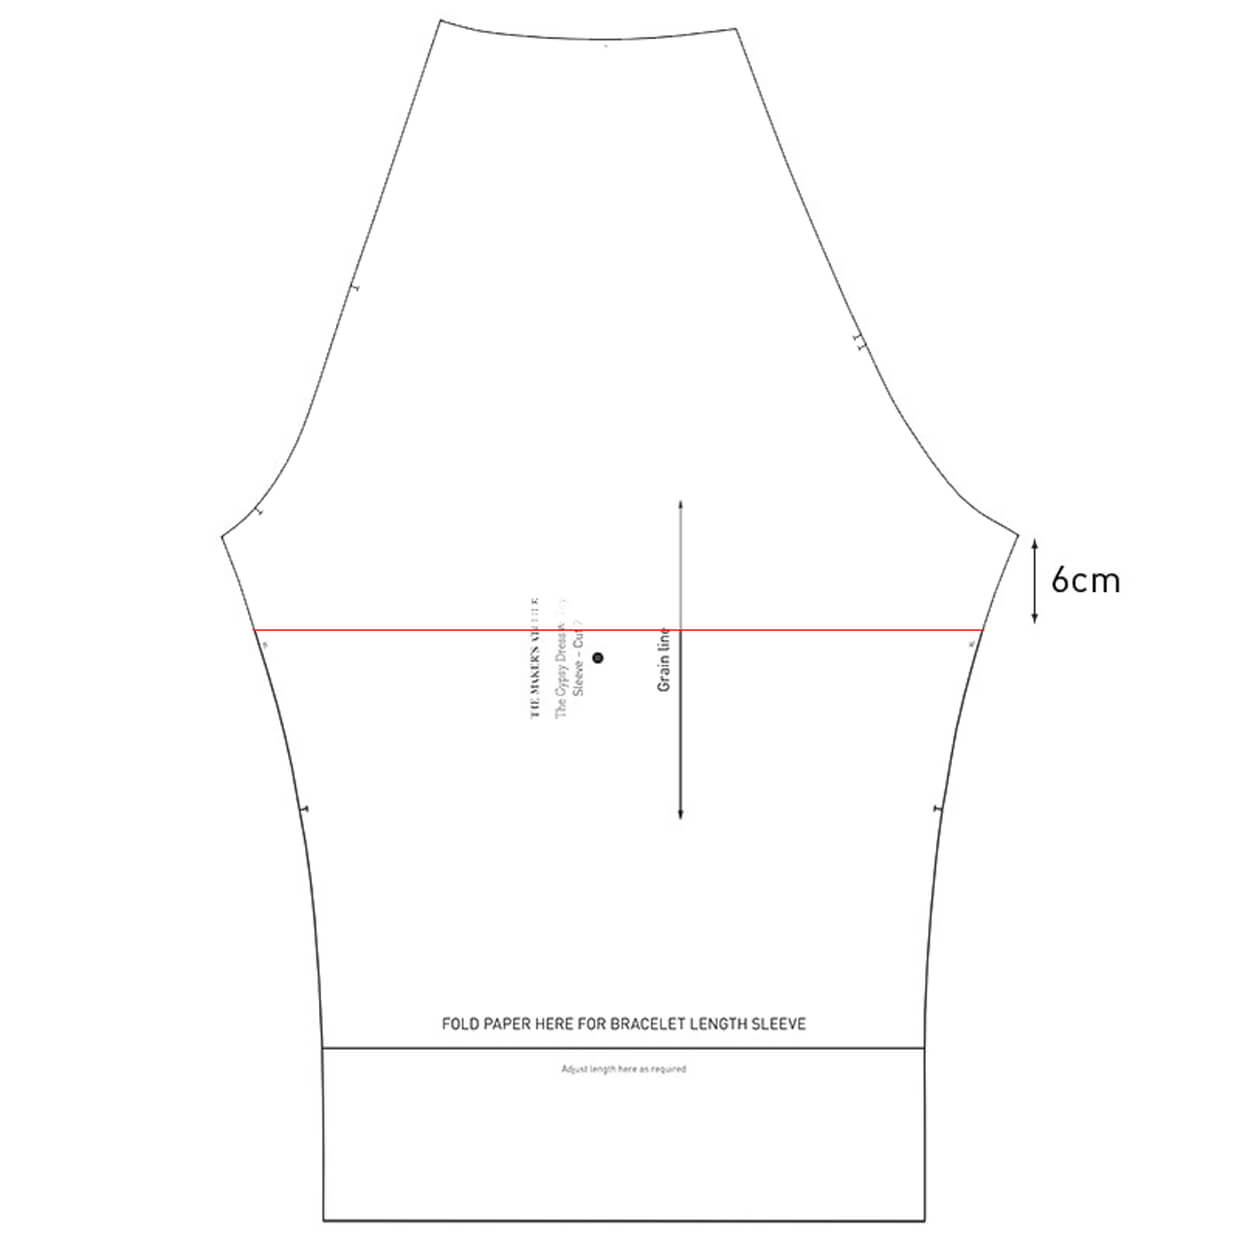
The other sleeve style you could try is a simple gathered detail at the bicep on a full-length sleeve. This works particularly well with finer summer fabrics like the cotton voile shown here. Here the cuff has been left un-gathered but trimmed. For the gather detail you will need 1m x 18mm cotton tape or seam binding and approximately 75cm x 12mm elastic. On your sleeve pieces mark a line 6cm down from the underarm (C). Do this by running a loose tacking stitch in a contrast colour - this makes it easier to remove at the end. Start making your blouse and once you have stitched the underarm seam, take your cotton tape or seam binding and create a channel for the elastic. Pin your tape over the marked line starting and ending at the underarm seam, trim as required. Carefully stitch along as close to each edge as possible. Place the elastic around your bicep and mark the length required with a pencil or chalk - do not cut yet, but make a note of the length. Thread your elastic through the channel gathering up the sleeve as you go. Once your elastic is through, overlap at the mark, stitch down and trim. Mark your elastic again with the same length and repeat for the other arm. Complete your blouse as instructed in the pattern, adding the trim of your choice.
