15th September 2021
Lining The Pea Coat - Step by Step
Lining the Pea Coat is slightly tricky, especially around the back vent area, so to compliment the instruction sheet these photographic steps might be useful.
 Step 8a – attaching the front lining to the side lining panel
 At the lining shoulder seam I left 1cm unstitched at the neck – this makes it easier to stitch to the jacket facing as shown further on.
 Step 8b – pining the lining to the jacket, right sides together.
 This is the front edge pinned
 At the neck pin the lining to the upper collar only
 I stitch the front lining up to the front facing first – stopping at the 1cm unstitched mentioned previously.
 I then pinned and stitched the lining to the top of the facing.
 Finally, I stitched the back neck to the upper collar. It is too tricky to stitch right to the neck point.
 So I finished this by hand.
 The lining turned through.
 At the hem – stitching the front facing. Trim the corner – I also trimmed back the facing hem as I didn’t want the thickness once turned through.
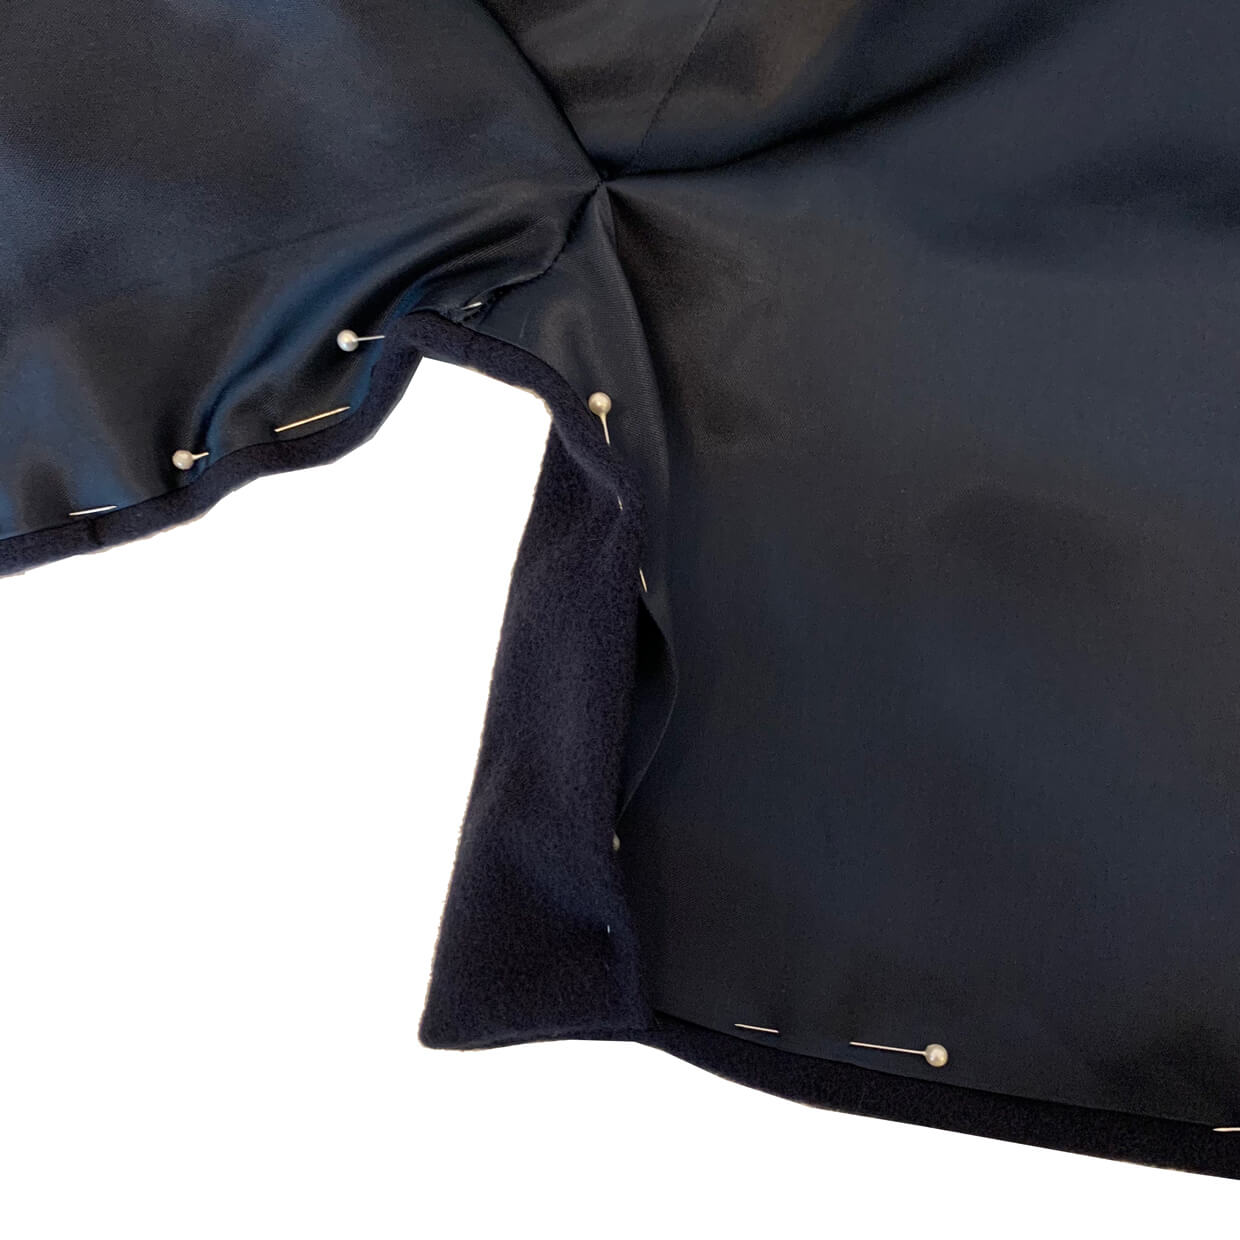
 At the back vent, turn the vent back on itself (similar to the front facing) and stitch along the pressed hem line and turn through.
 Pin the lining to the hem and along the vent edges. The Lining tucks inside the hemmed end of the vent.
 Hand stitch in place
 Finally, hand stitch the back vents in place.