26th January 2022
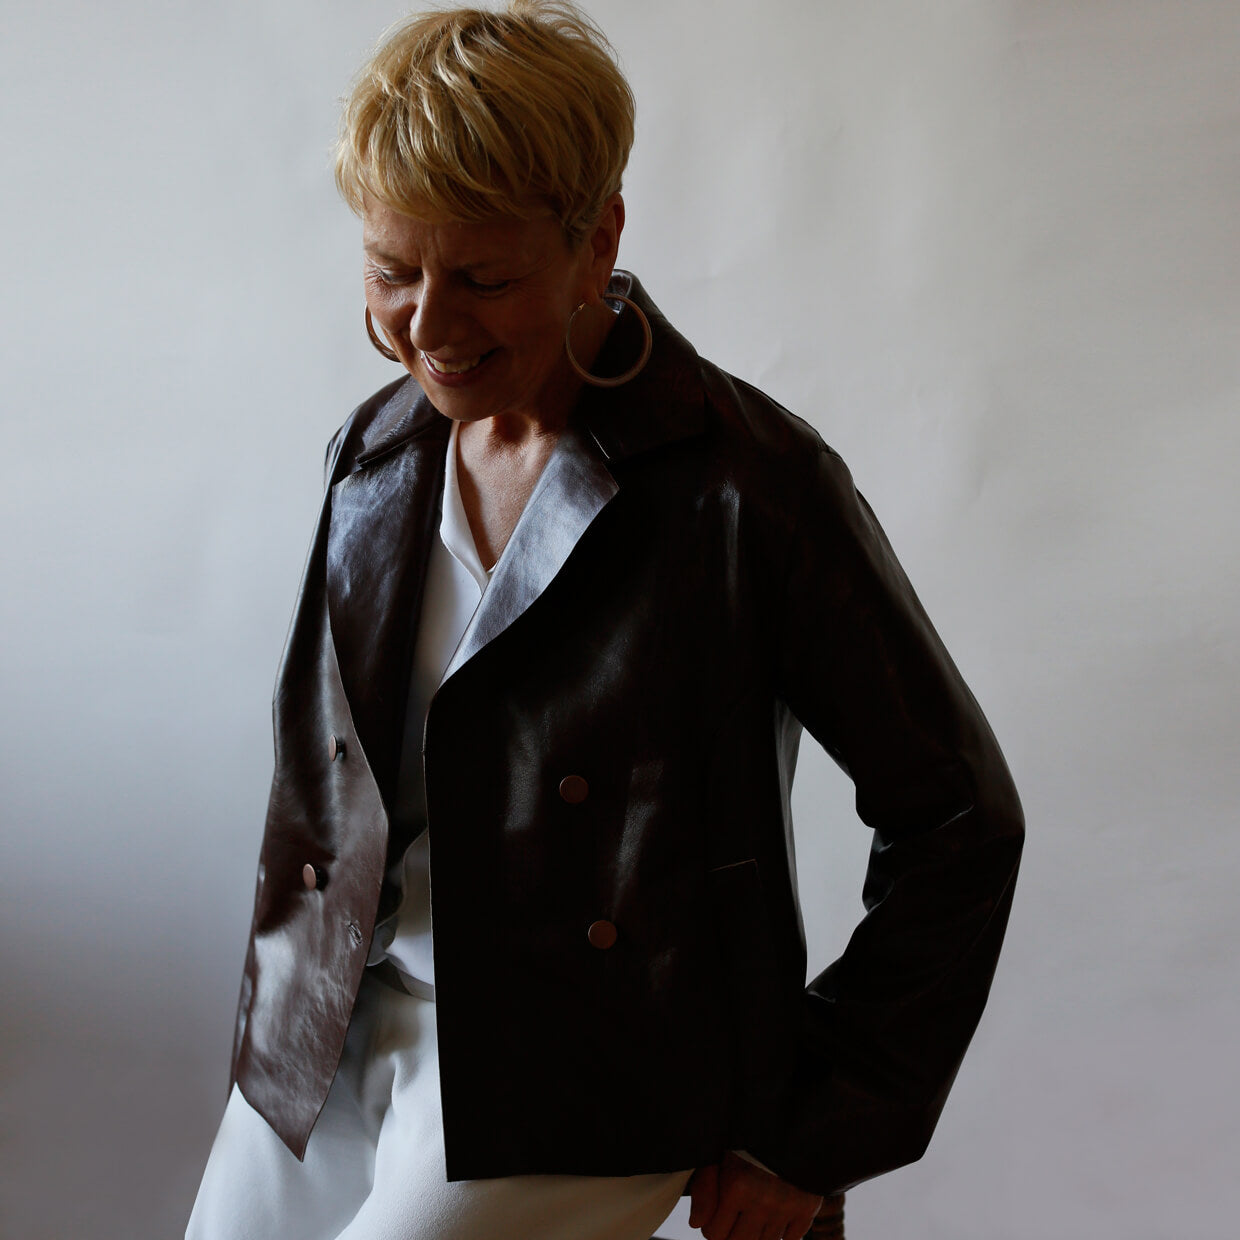
Making The Pea Coat in leather

At last year’s sewing retreat a lady made The Pea Coat in Leather. This was a challenge I had not tried myself so I thought I’d give it a go!
When working with leather you have to remember the limitations of the sewing machine you are using. The leather mustn’t be too thick for a domestic machine - I always try a small sample and perfect the stitch length, starting with the longest stitch and shortening if necessary. Too many needle perforations will mean the leather is prone to tearing.
The leather I chose for this jacket was the right thickness but it needed lining as the underside was marked. With some leathers such as lamb nappa this isn’t always the case as the underside is smooth and well finished. My problem with lining the jacket is that I wanted to have raw edges, I've found it’s the best way to finish leather garments made with a domestic machine. I can't get a professional finish if I stitch and then turn through the collar and lapels as I would with fabric. So with this jacket I created a hybrid between the two, a lined jacket with raw-edges. Here’s how I did it…..
I made up the outer shell of the jacket in leather including attaching the under collar, sleeves and half belt at the back, but not stitching down the back vents. For the pockets bags I used lining fabric.
Next I made the inner shell of the jacket. I stitched the top collar to the facings as instructed for the raw edged version in the pattern. I trimmed back the seam allowance at the back neck on both the outer jacket and the top collar and facings. I then made up the lining and attached it to the top collar and facing pieces.

Now comes the tricky bit – joining the outer and inner jacket. I glued the two collars and the edge of the facings together. I used a contact adhesive for leather, this remains flexible when dry. The trick is to start with the collar, then do each facing, so even though its one piece, do it in sections. I use a wallpaper roller to smooth out the leather as I go. Once the collar and facings have dried I trim the edges to neaten using a scalpel and metal ruler.
Next I attached the lining around the back vent area and hemmed the lining. This is fiddly! I placed the lining either side of the leather vent extensions, and decided to cut back the lining vent extension as I would encase the lining in the folded back leather vent. Before doing that I needed to turn up and stitch the hem of the lining. Once that was done, I folded the leather vent extensions over the lining and using the roller made a crease. I opened the folded leather out and applied a 2cm wide strip of glue down the crease, I placed the lining on the edge of the glue, folded the leather back in place and flattened with the roller. Once dry I then trimmed the folded edge with the scalpel and ruler. I stitched across the top of the vent to hold in place.

 To finish the sleeves, I turned up the outer sleeve over the sleeve lining and glued as I had for the back vent but stitched near the edge before trimming the edge as this area will get more wear.

Finally I attached stud buttons and for the buttonholes I neatly stitched a rectangle before carefully slitting the hole using the scalpel blade. I’m pleased with the final jacket however if I were to make it in leather of suede again I would choose skins that don’t need lining.

There is an excellent guide to buying leather here and the glue I used is available here