The Utility Jacket
PDF sewing pattern
£14.00
(VAT is added to all EU orders)
SIZES: 4-22
SEWING ABILITY: EXPERIENCED
The clean lines of this Utility Jacket capture a smarter casual mood.
Details include deep cuffs and hem with integrated pockets. The back is subtly shaped with the slide adjusters.
Fastenings here are hidden however that is optional and classic button or stud fastenings would also work.
 Anne, UK
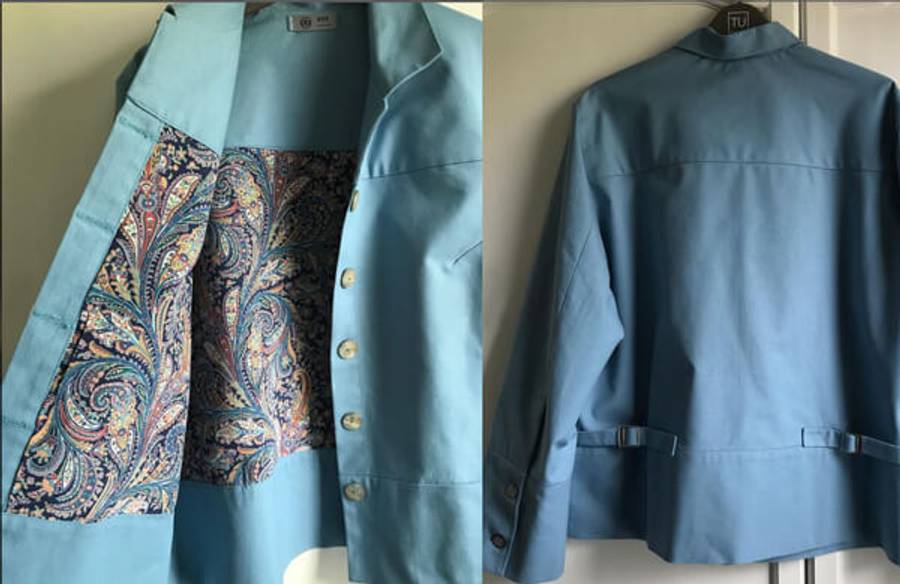
Latest make. I wanted something like a denim jacket, but not in denim, to wear with jeans. This is core range soft cotton duck canvas from Minerva and it’s lined with left over liberty silk in my stash. Lengthened the bodice by 5 cm and the sleeves by 2 cm. Used buttons from my stash rather than snaps.
This was my 2nd utility jacket (the first was unlined) using the pattern so that’s how I knew I wanted a bit more length in the sleeves and comparing it to my denim jacket I also made it longer. When I lined the main part I sewed the side seams of both the main jacket and lining first and then tacked the lining to the main fabric pieces. I stitched down the CF facings. The raw edges were then enclosed within the yolk and hem panel pieces. I also lined the sleeves and to make things easy tacked the main fabric and lining pieces together and treated them as one piece. I put 2 buttons on the sleeve cuff.
The pattern instructions were easy to follow. I sewed a size 14.
@avs1857
 Helen, UK
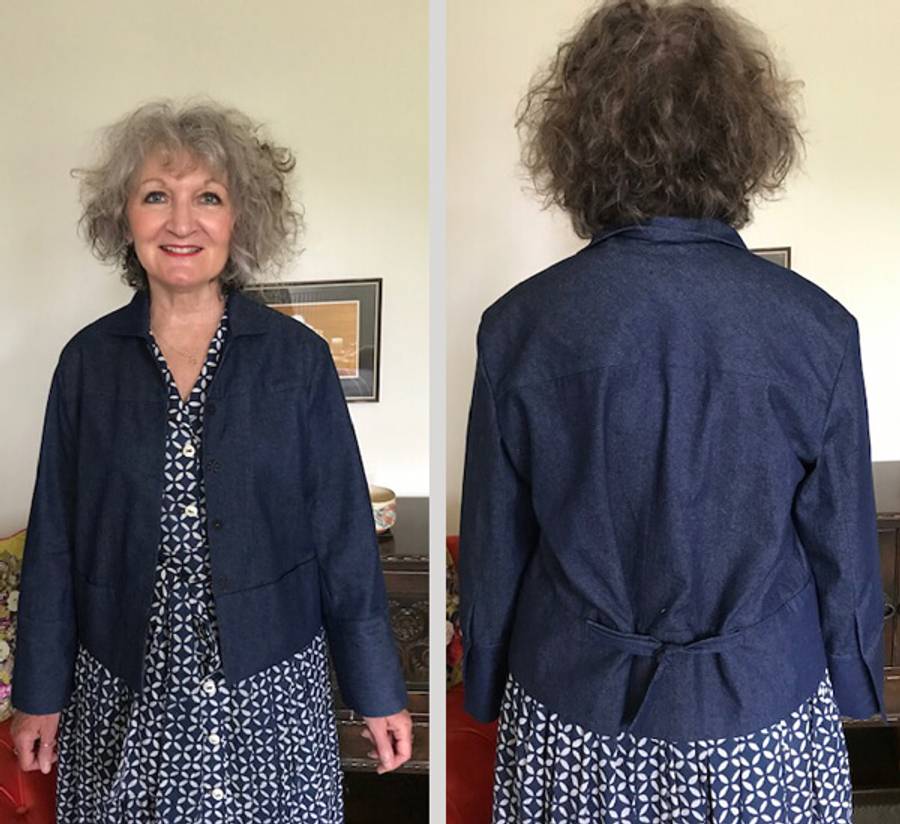
I’m really pleased with the jacket. The denim l bought with the pattern is lovely. I’m going to make this Utility jacket in a silk velvet later in the year.
 Gill, UK
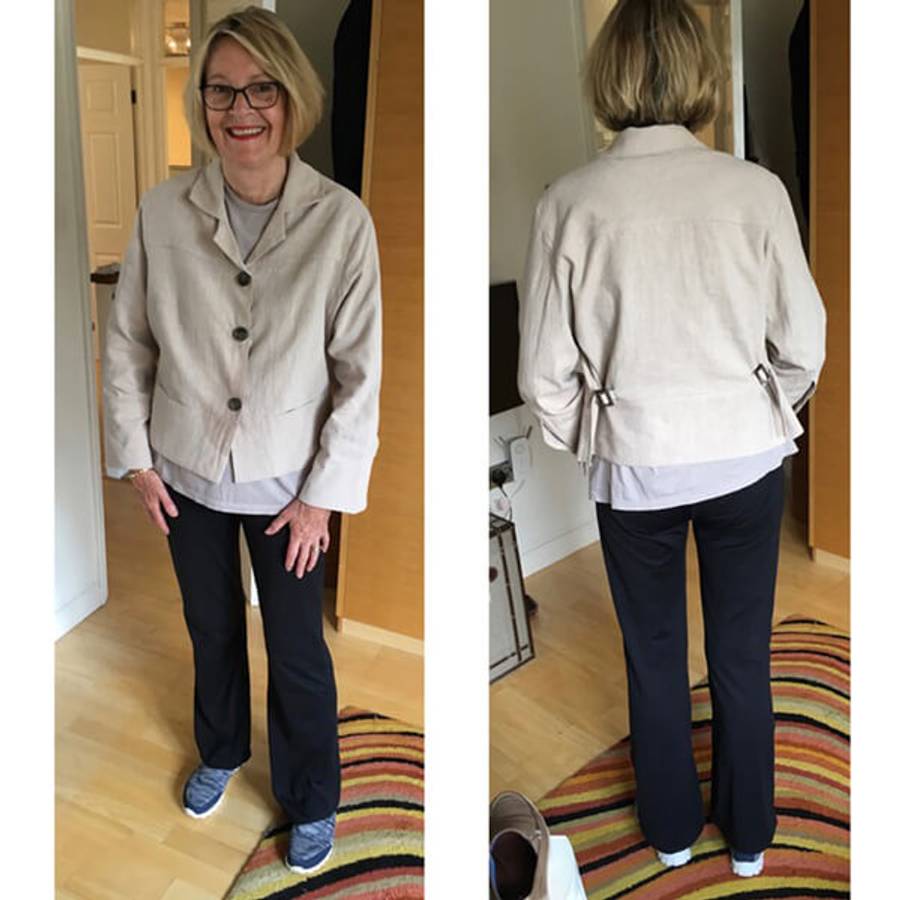
I have just successfully completed your jacket in a fairly heavy washed linen. Instead of poppers I used some large mother of pearl buttons and mother of pearl buckles. i am very pleased with it. As always your patterns work!
 Darlene, Canada
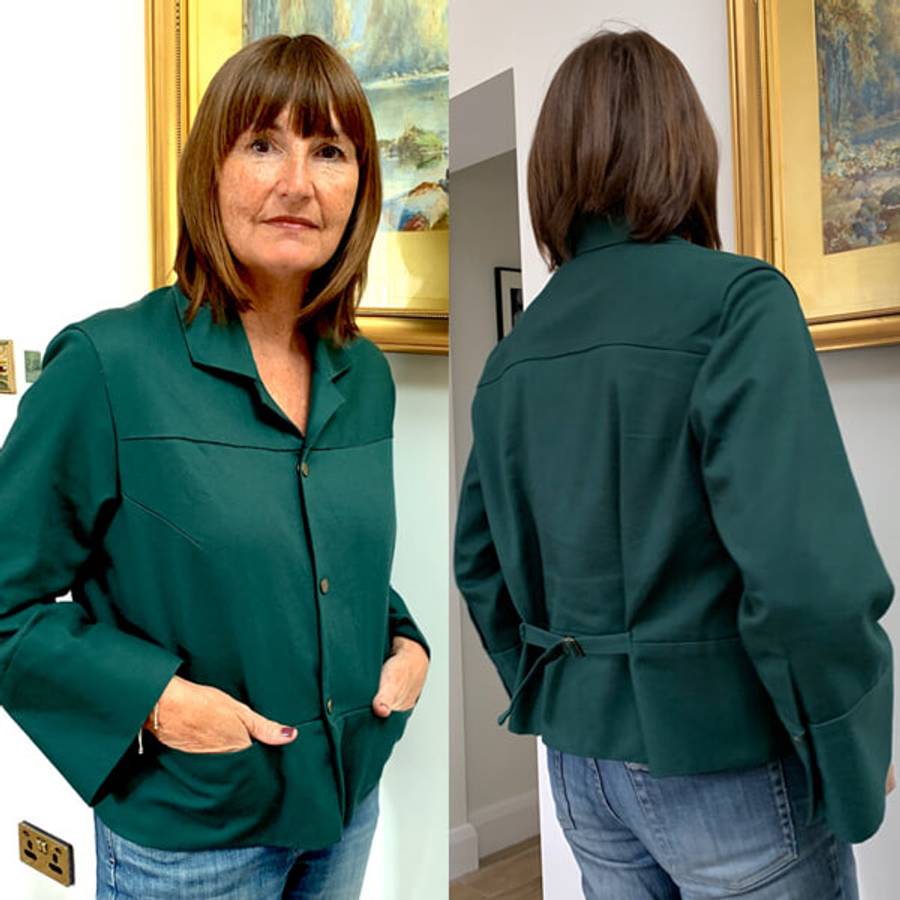
The causal and yet very stylish Utility Jacket is a dream to sew and looks fantastic on! I wanted to make it as soon as I saw the release. Thinking that my first jacket would be linen (I plan to make several) I made a 180 degree about face when I spotted a reasonably stable technical coated knit fabric that excited me. I decided to underline the body/sleeve portion of the jacket with cotton shirting for more comfort as I suspected 100% polyester content with my fashion fabric. I choose my high bust measurement for the pattern size and opted for a full bust adjustment (FBA) to accommodate a D cup, guessing that the pattern was likely drafted for a B cup. The resulting fit is perfect! I am very impressed with the bias-cut front/back upper bodice. It gives a nice smooth shape over the shoulders…just as Frances says it does! The pattern is very well drafted. I cut the size 20 and all the pieces fit together with precision, which is a hug relief even for an experienced sewer. The collar application is a breeze and behaves very well with no interfacing. I found some of the instructions to be a bit confusing but was pleased to receive a copy containing more clarity after attending a workshop with other Makers Atelier enthusiasts! Measurements provided to cut the adjustable straps resulted in a perfect fit inside my 1-inch slide buckle and once adjusted on the jacket looked exactly how I thought it should look. Another happy moment! The sleeves add lots of elegance to elevate this jacket from its more casual cousin, the jean jacket. They are elongated, ending in an extended cuff that can be closed slightly with a snap or left open to hang in a lovely modest bell shape. Using snaps for the front closure also preserves the clean lines of the design and adds a timeless style factor, in my opinion. I used 21mm large black snaps. Smaller snaps would also work and may suit a thinner fabric. The final finished length is flattering with the construction method of the bottom band adding enough body to hang smoothly and well. I LOVE this jacket and highly recommend it as a staple piece for any wardrobe. The design lends itself to many fabric choices beyond denim and linen. Give it a whirl!
 Kay, UK
This pattern is going to be a real favourite. I made it in a cotton drill and absolutely love it. Quite a number of pattern pieces but seams are all straight so not too difficult with a little concentration. I found the most challenging part to be the sleeve plackets but did manage it and it will be easy next time.
 Anne, UK
Latest make. I wanted something like a denim jacket, but not in denim, to wear with jeans. This is core range soft cotton duck canvas from Minerva and it’s lined with left over liberty silk in my stash. Lengthened the bodice by 5 cm and the sleeves by 2 cm. Used buttons from my stash rather than snaps.
This was my 2nd utility jacket (the first was unlined) using the pattern so that’s how I knew I wanted a bit more length in the sleeves and comparing it to my denim jacket I also made it longer. When I lined the main part I sewed the side seams of both the main jacket and lining first and then tacked the lining to the main fabric pieces. I stitched down the CF facings. The raw edges were then enclosed within the yolk and hem panel pieces. I also lined the sleeves and to make things easy tacked the main fabric and lining pieces together and treated them as one piece. I put 2 buttons on the sleeve cuff.
The pattern instructions were easy to follow. I sewed a size 14.
@avs1857
 Helen, UK
I’m really pleased with the jacket. The denim l bought with the pattern is lovely. I’m going to make this Utility jacket in a silk velvet later in the year.
 Gill, UK
I have just successfully completed your jacket in a fairly heavy washed linen. Instead of poppers I used some large mother of pearl buttons and mother of pearl buckles. i am very pleased with it. As always your patterns work!
 Darlene, Canada
The causal and yet very stylish Utility Jacket is a dream to sew and looks fantastic on! I wanted to make it as soon as I saw the release. Thinking that my first jacket would be linen (I plan to make several) I made a 180 degree about face when I spotted a reasonably stable technical coated knit fabric that excited me. I decided to underline the body/sleeve portion of the jacket with cotton shirting for more comfort as I suspected 100% polyester content with my fashion fabric. I choose my high bust measurement for the pattern size and opted for a full bust adjustment (FBA) to accommodate a D cup, guessing that the pattern was likely drafted for a B cup. The resulting fit is perfect! I am very impressed with the bias-cut front/back upper bodice. It gives a nice smooth shape over the shoulders…just as Frances says it does! The pattern is very well drafted. I cut the size 20 and all the pieces fit together with precision, which is a hug relief even for an experienced sewer. The collar application is a breeze and behaves very well with no interfacing. I found some of the instructions to be a bit confusing but was pleased to receive a copy containing more clarity after attending a workshop with other Makers Atelier enthusiasts! Measurements provided to cut the adjustable straps resulted in a perfect fit inside my 1-inch slide buckle and once adjusted on the jacket looked exactly how I thought it should look. Another happy moment! The sleeves add lots of elegance to elevate this jacket from its more casual cousin, the jean jacket. They are elongated, ending in an extended cuff that can be closed slightly with a snap or left open to hang in a lovely modest bell shape. Using snaps for the front closure also preserves the clean lines of the design and adds a timeless style factor, in my opinion. I used 21mm large black snaps. Smaller snaps would also work and may suit a thinner fabric. The final finished length is flattering with the construction method of the bottom band adding enough body to hang smoothly and well. I LOVE this jacket and highly recommend it as a staple piece for any wardrobe. The design lends itself to many fabric choices beyond denim and linen. Give it a whirl!
 Kay, UK
This pattern is going to be a real favourite. I made it in a cotton drill and absolutely love it. Quite a number of pattern pieces but seams are all straight so not too difficult with a little concentration. I found the most challenging part to be the sleeve plackets but did manage it and it will be easy next time.
 Anne, UK
Latest make. I wanted something like a denim jacket, but not in denim, to wear with jeans. This is core range soft cotton duck canvas from Minerva and it’s lined with left over liberty silk in my stash. Lengthened the bodice by 5 cm and the sleeves by 2 cm. Used buttons from my stash rather than snaps.
This was my 2nd utility jacket (the first was unlined) using the pattern so that’s how I knew I wanted a bit more length in the sleeves and comparing it to my denim jacket I also made it longer. When I lined the main part I sewed the side seams of both the main jacket and lining first and then tacked the lining to the main fabric pieces. I stitched down the CF facings. The raw edges were then enclosed within the yolk and hem panel pieces. I also lined the sleeves and to make things easy tacked the main fabric and lining pieces together and treated them as one piece. I put 2 buttons on the sleeve cuff.
The pattern instructions were easy to follow. I sewed a size 14.
@avs1857
 Helen, UK
I’m really pleased with the jacket. The denim l bought with the pattern is lovely. I’m going to make this Utility jacket in a silk velvet later in the year.
 Gill, UK
I have just successfully completed your jacket in a fairly heavy washed linen. Instead of poppers I used some large mother of pearl buttons and mother of pearl buckles. i am very pleased with it. As always your patterns work!
 Darlene, Canada
The causal and yet very stylish Utility Jacket is a dream to sew and looks fantastic on! I wanted to make it as soon as I saw the release. Thinking that my first jacket would be linen (I plan to make several) I made a 180 degree about face when I spotted a reasonably stable technical coated knit fabric that excited me. I decided to underline the body/sleeve portion of the jacket with cotton shirting for more comfort as I suspected 100% polyester content with my fashion fabric. I choose my high bust measurement for the pattern size and opted for a full bust adjustment (FBA) to accommodate a D cup, guessing that the pattern was likely drafted for a B cup. The resulting fit is perfect! I am very impressed with the bias-cut front/back upper bodice. It gives a nice smooth shape over the shoulders…just as Frances says it does! The pattern is very well drafted. I cut the size 20 and all the pieces fit together with precision, which is a hug relief even for an experienced sewer. The collar application is a breeze and behaves very well with no interfacing. I found some of the instructions to be a bit confusing but was pleased to receive a copy containing more clarity after attending a workshop with other Makers Atelier enthusiasts! Measurements provided to cut the adjustable straps resulted in a perfect fit inside my 1-inch slide buckle and once adjusted on the jacket looked exactly how I thought it should look. Another happy moment! The sleeves add lots of elegance to elevate this jacket from its more casual cousin, the jean jacket. They are elongated, ending in an extended cuff that can be closed slightly with a snap or left open to hang in a lovely modest bell shape. Using snaps for the front closure also preserves the clean lines of the design and adds a timeless style factor, in my opinion. I used 21mm large black snaps. Smaller snaps would also work and may suit a thinner fabric. The final finished length is flattering with the construction method of the bottom band adding enough body to hang smoothly and well. I LOVE this jacket and highly recommend it as a staple piece for any wardrobe. The design lends itself to many fabric choices beyond denim and linen. Give it a whirl!
 Kay, UK
This pattern is going to be a real favourite. I made it in a cotton drill and absolutely love it. Quite a number of pattern pieces but seams are all straight so not too difficult with a little concentration. I found the most challenging part to be the sleeve plackets but did manage it and it will be easy next time.
 Anne, UK
Latest make. I wanted something like a denim jacket, but not in denim, to wear with jeans. This is core range soft cotton duck canvas from Minerva and it’s lined with left over liberty silk in my stash. Lengthened the bodice by 5 cm and the sleeves by 2 cm. Used buttons from my stash rather than snaps.
This was my 2nd utility jacket (the first was unlined) using the pattern so that’s how I knew I wanted a bit more length in the sleeves and comparing it to my denim jacket I also made it longer. When I lined the main part I sewed the side seams of both the main jacket and lining first and then tacked the lining to the main fabric pieces. I stitched down the CF facings. The raw edges were then enclosed within the yolk and hem panel pieces. I also lined the sleeves and to make things easy tacked the main fabric and lining pieces together and treated them as one piece. I put 2 buttons on the sleeve cuff.
The pattern instructions were easy to follow. I sewed a size 14.
@avs1857
 Helen, UK
I’m really pleased with the jacket. The denim l bought with the pattern is lovely. I’m going to make this Utility jacket in a silk velvet later in the year.
 Gill, UK
I have just successfully completed your jacket in a fairly heavy washed linen. Instead of poppers I used some large mother of pearl buttons and mother of pearl buckles. i am very pleased with it. As always your patterns work!
 Darlene, Canada
The causal and yet very stylish Utility Jacket is a dream to sew and looks fantastic on! I wanted to make it as soon as I saw the release. Thinking that my first jacket would be linen (I plan to make several) I made a 180 degree about face when I spotted a reasonably stable technical coated knit fabric that excited me. I decided to underline the body/sleeve portion of the jacket with cotton shirting for more comfort as I suspected 100% polyester content with my fashion fabric. I choose my high bust measurement for the pattern size and opted for a full bust adjustment (FBA) to accommodate a D cup, guessing that the pattern was likely drafted for a B cup. The resulting fit is perfect! I am very impressed with the bias-cut front/back upper bodice. It gives a nice smooth shape over the shoulders…just as Frances says it does! The pattern is very well drafted. I cut the size 20 and all the pieces fit together with precision, which is a hug relief even for an experienced sewer. The collar application is a breeze and behaves very well with no interfacing. I found some of the instructions to be a bit confusing but was pleased to receive a copy containing more clarity after attending a workshop with other Makers Atelier enthusiasts! Measurements provided to cut the adjustable straps resulted in a perfect fit inside my 1-inch slide buckle and once adjusted on the jacket looked exactly how I thought it should look. Another happy moment! The sleeves add lots of elegance to elevate this jacket from its more casual cousin, the jean jacket. They are elongated, ending in an extended cuff that can be closed slightly with a snap or left open to hang in a lovely modest bell shape. Using snaps for the front closure also preserves the clean lines of the design and adds a timeless style factor, in my opinion. I used 21mm large black snaps. Smaller snaps would also work and may suit a thinner fabric. The final finished length is flattering with the construction method of the bottom band adding enough body to hang smoothly and well. I LOVE this jacket and highly recommend it as a staple piece for any wardrobe. The design lends itself to many fabric choices beyond denim and linen. Give it a whirl!
 Kay, UK
This pattern is going to be a real favourite. I made it in a cotton drill and absolutely love it. Quite a number of pattern pieces but seams are all straight so not too difficult with a little concentration. I found the most challenging part to be the sleeve plackets but did manage it and it will be easy next time.
 Anne, UK
Latest make. I wanted something like a denim jacket, but not in denim, to wear with jeans. This is core range soft cotton duck canvas from Minerva and it’s lined with left over liberty silk in my stash. Lengthened the bodice by 5 cm and the sleeves by 2 cm. Used buttons from my stash rather than snaps.
This was my 2nd utility jacket (the first was unlined) using the pattern so that’s how I knew I wanted a bit more length in the sleeves and comparing it to my denim jacket I also made it longer. When I lined the main part I sewed the side seams of both the main jacket and lining first and then tacked the lining to the main fabric pieces. I stitched down the CF facings. The raw edges were then enclosed within the yolk and hem panel pieces. I also lined the sleeves and to make things easy tacked the main fabric and lining pieces together and treated them as one piece. I put 2 buttons on the sleeve cuff.
The pattern instructions were easy to follow. I sewed a size 14.
@avs1857
 Helen, UK
I’m really pleased with the jacket. The denim l bought with the pattern is lovely. I’m going to make this Utility jacket in a silk velvet later in the year.
 Gill, UK
I have just successfully completed your jacket in a fairly heavy washed linen. Instead of poppers I used some large mother of pearl buttons and mother of pearl buckles. i am very pleased with it. As always your patterns work!
 Darlene, Canada
The causal and yet very stylish Utility Jacket is a dream to sew and looks fantastic on! I wanted to make it as soon as I saw the release. Thinking that my first jacket would be linen (I plan to make several) I made a 180 degree about face when I spotted a reasonably stable technical coated knit fabric that excited me. I decided to underline the body/sleeve portion of the jacket with cotton shirting for more comfort as I suspected 100% polyester content with my fashion fabric. I choose my high bust measurement for the pattern size and opted for a full bust adjustment (FBA) to accommodate a D cup, guessing that the pattern was likely drafted for a B cup. The resulting fit is perfect! I am very impressed with the bias-cut front/back upper bodice. It gives a nice smooth shape over the shoulders…just as Frances says it does! The pattern is very well drafted. I cut the size 20 and all the pieces fit together with precision, which is a hug relief even for an experienced sewer. The collar application is a breeze and behaves very well with no interfacing. I found some of the instructions to be a bit confusing but was pleased to receive a copy containing more clarity after attending a workshop with other Makers Atelier enthusiasts! Measurements provided to cut the adjustable straps resulted in a perfect fit inside my 1-inch slide buckle and once adjusted on the jacket looked exactly how I thought it should look. Another happy moment! The sleeves add lots of elegance to elevate this jacket from its more casual cousin, the jean jacket. They are elongated, ending in an extended cuff that can be closed slightly with a snap or left open to hang in a lovely modest bell shape. Using snaps for the front closure also preserves the clean lines of the design and adds a timeless style factor, in my opinion. I used 21mm large black snaps. Smaller snaps would also work and may suit a thinner fabric. The final finished length is flattering with the construction method of the bottom band adding enough body to hang smoothly and well. I LOVE this jacket and highly recommend it as a staple piece for any wardrobe. The design lends itself to many fabric choices beyond denim and linen. Give it a whirl!
 Kay, UK
This pattern is going to be a real favourite. I made it in a cotton drill and absolutely love it. Quite a number of pattern pieces but seams are all straight so not too difficult with a little concentration. I found the most challenging part to be the sleeve plackets but did manage it and it will be easy next time.
Fabric and Trim Suggestions
Medium weight wovens including denim, linen, canvas and cotton drill. Lighter weight wool flannels and suitings.
The denim jacket in the image has 3 x 25mm snaps to fasten the front and 2 x 15mm on the sleeves.
The adjustable strap dimensions in the pattern are for a 30mm slide adjuster. But the straps can be altered to suit other sizes.
Digital pattern formats
Our digital patterns are immediately downloadable with PDF files for AT HOME printing on A4 or US paper sizes and COPY SHOP printing on A0 sheets. Read more in this Journal post.
Please note once purchased, you will receive two emails: your purchase receipt and the download email. Please check your junk folder if you don't receive both.
The PDF files should be opened using Adobe Acrobat Reader.
For security purposes the number of downloads per file are limited. Please download each file to the device you intend to save the file on, and SAVE the file before opening and printing. In this way you will be able to print as required. Multiple downloads will lock the file.
The patterns are multi-sized and all sizes print on the At Home and Copy Shop versions.
Digital magazine formats
Our digital magazines with an accompanying pattern are immediately downloadable. The digital files are supplied in PDF format and the pattern is printable AT HOME on A4 or US paper sizes.


